Coding an Advent Calendar: Day 6
This year, I decided to create an Advent Calendar website in HTML5, CSS3, and JavaScript. My hopes for the site are to showcase some of my frontend development abilities as well as make something fun, functional, and reusable.
Day 6
- Add README.md
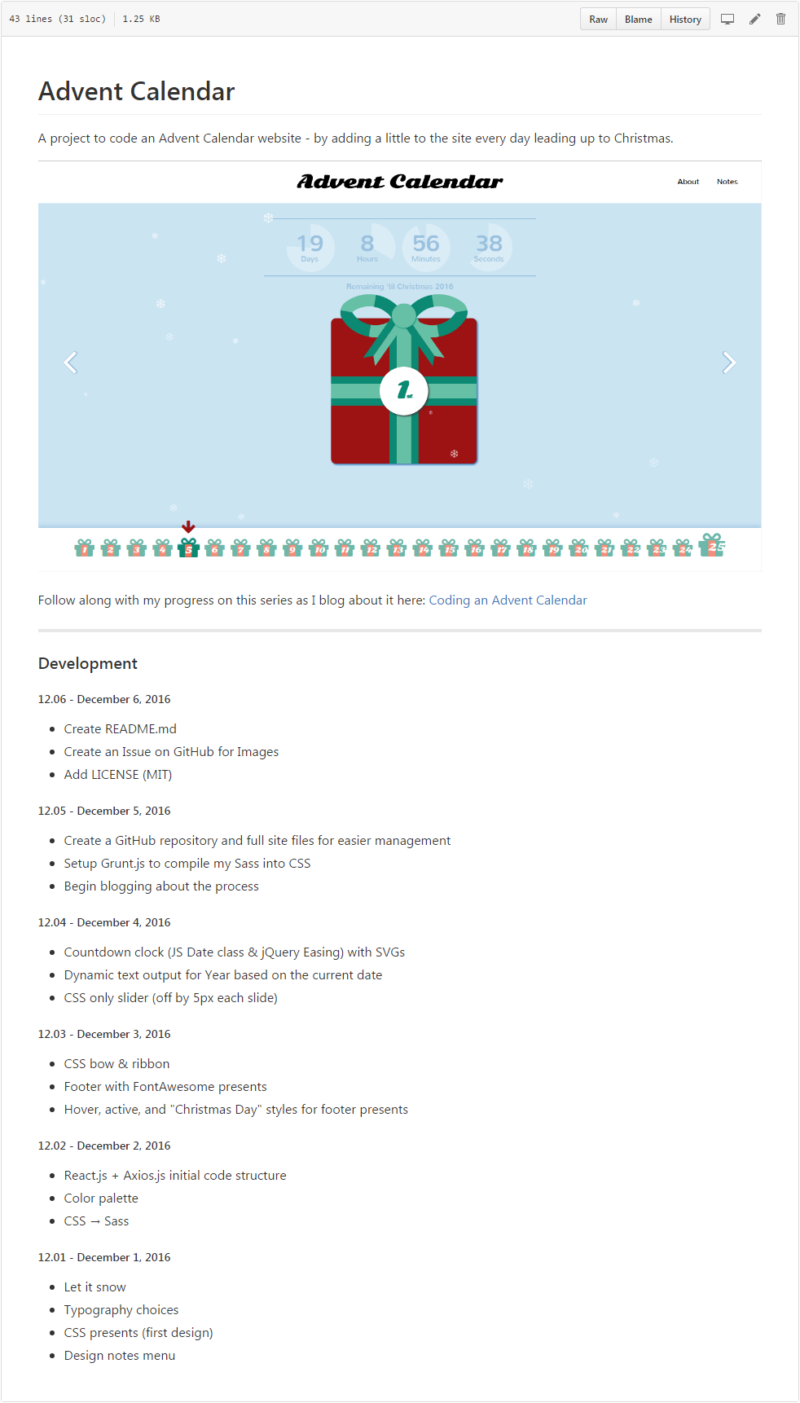
- Actually, part of Day 5’s work of setting up Grunt, Sass, and Autoprefixer* for development carried over into Day 6. So, I did little more coding and more work on the overall project housed on GitHub. Part of this work included adding a README file that would stand as the GitHub project’s “front page”. There are at least 3 things I like to include in GitHub README files:
- A main project image (and possibly some other images)
- A description of the project: what it is and how to use it
- A Changelog that shows the various updates to the project over time (I have considered adding this as a separate CHANGELOG.md file, but decided for the time being to leave it in my “front page” README.md)
*Actually, Autoprefixer is now deprecated in favor of
grunt-postcssso I will probably take some time to set that up later as well. - Add a GitHub Issue for Images
- Adding an image to a GitHub README is relatively easy: all you need is a link to an image that already resides online. You can add this with a ! in front of the image link:
However, if you do not HAVE an image online yet, and you were intending to use an image directly from the GitHub repository itself, you may run into some trouble because you can’t just “Upload Image” anywhere easily. But there is one easy “hack” I stumbled across online some time ago that I’ve been using for a while:
- Create a GitHub Issue and upload an image there. GitHub will let you drag and drop an image from your desktop into the Issue reporter textarea, and from there you can grab the link to the uploaded image to use in your README.
This could be a little “messy” because now you will always have at least 1 Issue open for that repository (unless you move your image link offsite), but it works. (I’d tried to do the same thing with GitHub’s Wiki for the repository, but it also won’t allow you to upload an image. Rather it requests the Image URL.)
- Add LICENSE
- Finally, I decided to add a LICENSE to the repository.
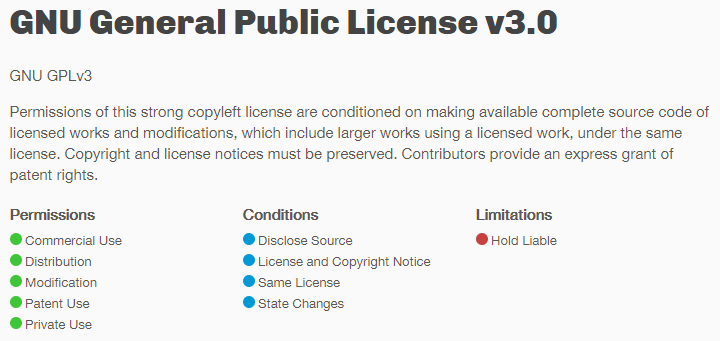
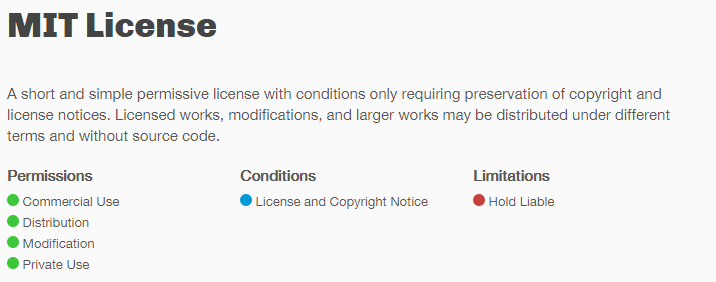
Since I’ve been developing WordPress stuff for many years now, I’ve come to know and enjoy the GPL license quite a bit. But, I didn’t know if I wanted to just go with that right off the bat, or if perhaps there was something else I might choose. So, I started investigating things and stumbled upon an excellent website that let me compare the different Open Source licenses easily. I considered two choices:
I decided to use the MIT License as it seemed to be a little simpler and had less Conditions.
*Side note: After getting my first WordPress theme approved for the WordPress.org Theme Directory, I realized how important keeping track of the resources you use in a project is. Before approval, I needed to list all the projects, sources, and licenses of every additional piece of software or code I used in my theme (like any Google Fonts I used, FontAwesome, the Foundation Framework, and so on). This is something I may decide is important to do for this project as well.
Work Completed (to date)
- December 6, 2016
- Add README.md
- Add a GitHub Issue to hold usable images
- Add LICENSE
- December 5, 2016
- Create a GitHub repository and full site files for easier management
- Setup Grunt.js to compile my Sass into CSS
- Begin blogging about the process
- December 4, 2016
- Countdown clock (JS Date class & jQuery Easing) with SVGs
- Dynamic text output for Year based on the current date
- CSS only slider (off by 5px each slide)
- December 3, 2016
- CSS bow & ribbon
- Footer with FontAwesome presents
- Hover, active, and “Christmas Day” styles for footer presents
- December 2, 2016
- React.js + Axios.js initial code structure
- Color palette
- CSS → Sass
- December 1, 2016
- Let it snow
- Typography choices
- CSS presents (first design)
- Design notes menu


